Contents:
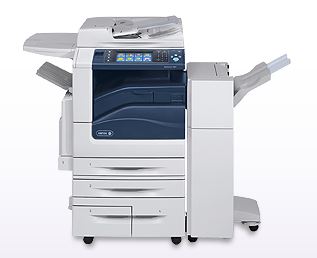
Xerox WorkCentre 7855.
You can check the status of your print jobs and other information about our printer by going to the website that consists of the IP number of the printer: http://<IP number here>.
If you visit the Xerox physically you'll find the IP number is taped to the front of the printer.
How to connect to the Xerox WC 7855 from your office computer.
Xerox WorkCentre 7855 (see the product description). If you do not have the printer drivers already installed, download the Xerox Global driver for your Operating System from the Xerox support page.
Configuration
First Install on Mac OS X
System Preferences > Print and Fax
Click + to add printer
Select IPP (Internet Printing Protocol)
- Address: <ARF printer's IP number> [find it stuck to the front of the Xerox]
- Queue: <blank>
- Name: ARF Xerox
- Location: ARF
- Print Using: <select driver: Xerox Global>
In the dialog select "4 Paper Trays"
Part II
When you issue the Print... command from an Application you must choose "Accounting" from the print dialog.
- In Acrobat Pro on Mac choose Print then click
- Button labeled Printer.... then choose Layout... menu and change to Xerox Features
- Change Paper Output menu to Advanced...
- Scroll to Configuration: Accounting...
- Open Accounting choose Xerox Standard Accounting... and Default Group Account. Enter your ARF Xerox code in thje Default User ID Field
- Preview...
- Print... change Preview menu to Xerox Features.
- Paper Output change to Advanced...
- In Microsoft Word choose Print...
- Look for the drop down menu "Copies & Pages..." and select "Accounting..." from the list.
- Choose "Standard Accounting or Auditron" and select "Use Default Accounting Code".
- Default User ID: <enter copy code>
- Account Type: General Account
- Default Account ID: <leave blank>
- Note: don't store the Accounting number if you're on a shared computer.
First Install on Windows
Download the Xerox Print driver "
WorkCentre 7830/7835/7845/7855 with built-in controller" from
http://www.support.xerox.com/support/workcentre-7800-series/downloads/en...
Add Device procedure
- Control Panel > Hardware > View Devices and Printers...
- Add Printer
- Add a Local Printer
- Choose Create a New Port and select "Standard TCP/IP Port"
- Hostname or IP address: <ARF Xerox IP number>
- Port name: ARF Xerox
- Uncheck the "Query port to acquire driver"
- install Driver from http://www.support.xerox.com/support/workcentre-7800-series/downloads/enca.html
- Do not Register the product (it has been registered).
- Choose Xerox (Manufacturer) and "Xerox WorkCentre 7855" as the printer.
- Type "ARF Xerox WC7855" as the Printer Name.
- Choose "Do not share this printer"
Configuration for Accounting
- First install printer driver and connection as described above
- Go to Control Panel > Hardware > View Devices and Printers...
- Double Click "ARF Xerox WC7855" in the list of printers
- Choose "Customize your printer"
- Under the Configuration tab click on Accounting
- (if Accounting is not listed look under the Options tab and change "Configuration:" to "Xerox Workcentre 7855")
- Under Accounting System choose Xerox Standard Accounting or Auditron.
- On a shared machine "Accounting Prompt" on Always Prompt. On a personal machine choose "Do Not Prompt" and put your printing code in the Default User ID field.


